How to use multi-account functions in WHM
Description :
In WHM, you can easily access the multi account functions feature for modifying, upgrading or terminating multiple web hosting accounts once.
The Multi Account Functions provides you with two separate tools – Modify/Upgrade Multiple Accounts and Terminate Multiple Accounts.
Now we are going to watch about the basics of using the Multi-Account functions in WHM to adjust various settings or configurations for cPanel accounts.
We will go over how multi-account functions can adjust: IP Addresses, Account Packages, and Account Terminations.
Step 1 : To begin the process => login to the WHM.
Step 2 : Select => Multi Account Functions.

Step 3 : After selecting the Multi Account Functions item you will then see a page with each function.

There we can select the functions we like to use.
Step 4 : Change Sites IP Address.
- We can change the IP address of multiple cPanel accounts using => Change Multiple Sites IP Addresses.
From this page we can see the list of each cPanel account on the server, we can click each checkbox next to each cPanel for the accounts we like to modify.

- On the next page you will see a list of domains you selected, each with a drop down selection of available IPs on the server.
After selecting the IP’s which we like to modify click => Change IPs button for making changes.

- After clicking => Change IP option, page showing the result of IP change.

Step 5 : Modify/Upgrade Accounts
- If we want to modify or upgrade multiple accounts we can use the option => Modify/Upgrade Multiple Accounts
The next page will present a similar list to that of Changing Multiple Sites IP.

Here we can select the accounts which we want to modify.
- Once we have selected the accounts which we want to modify, you can see the option for mass assignment.
Here we can,
- Select the reseller using => Choose a Reseller under Reseller
- Modify the Theme of accounts using => Theme
- Assign date using => Start date.
- Select the package using => Package
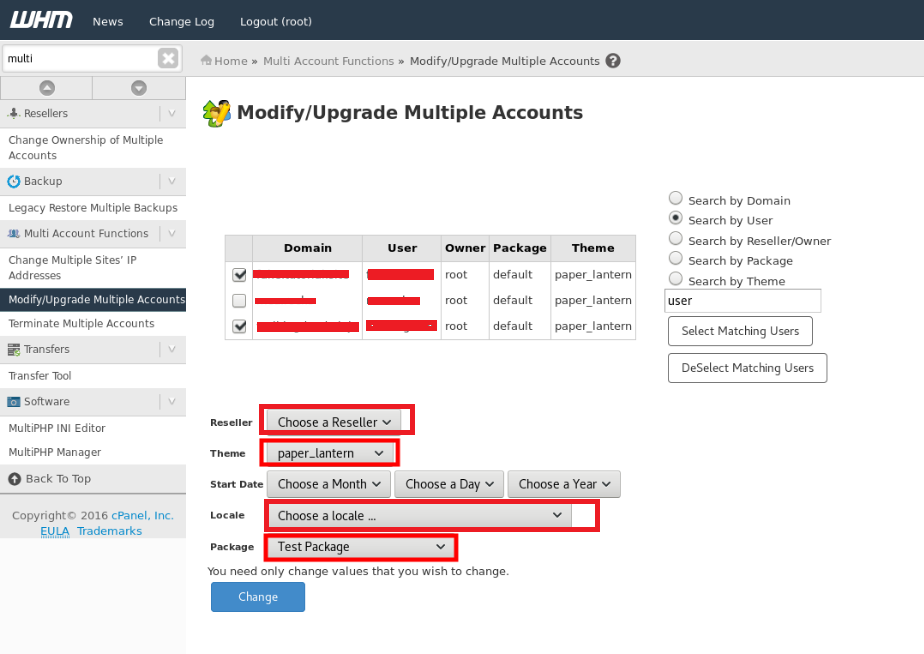
- Afer modify the values click => Change option for making changes.
You will see the changes after modify the details, once the changes gets completed we can see “All modifications complete“.

Step 6 : Terminating Accounts
- In WHM when attempting to terminate multiple accounts via the “Terminate Multiple Accounts” option you will first be prompted with the following screen.
- Here click on => Click this link option, when we are not redirected in 15 seconds.

- We will be on the interface where you can select accounts for termination.
Here we can select the accounts we would like to terminate.

- Before clicking the button you should note the warnings presented on the page. All data associated with accounts selected for termination will be destroyed and this cannot be undone.

- Once you have selected the accounts you’d like to terminate you will click “Remove selected accounts”.

- You will then be presented by an additional confirmation dialog below the button you just clicked.

- After clicking the “Yes, remove the selected accounts” button you will see a final confirmation dialog.

Finally, if you wish to continue, click the check box and the confirmation button. The accounts will be queued for termination and will no longer be on the server.
Related Posts

Managing SSL Certificates in cPanel: A Quick Guide

How to find out who is using a file in linux
